Objective
To create an OData datasource in AutoTag by entering an OData service url.
Procedure
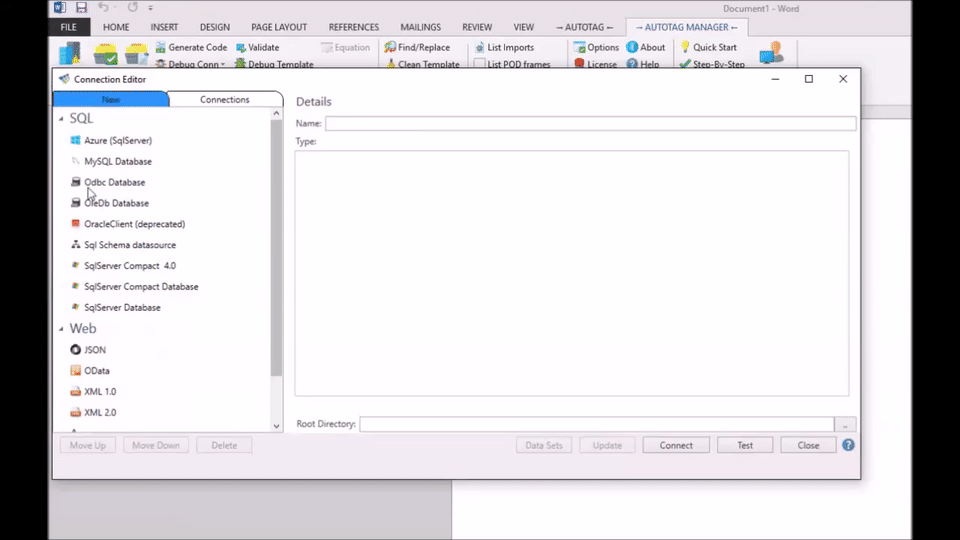
1. Click the Datasources button
Click the Data Sources button on the AutoTag Manager ribbon. This will open theConnection Editor window. Here, you can create a database connection for your document, referred to as a datasource.
By clicking the bottom arrow on the Data Sources button, and selecting Datasource Wizard, I can opt to enter my data in a guided wizard instead (not shown in this tutorial)
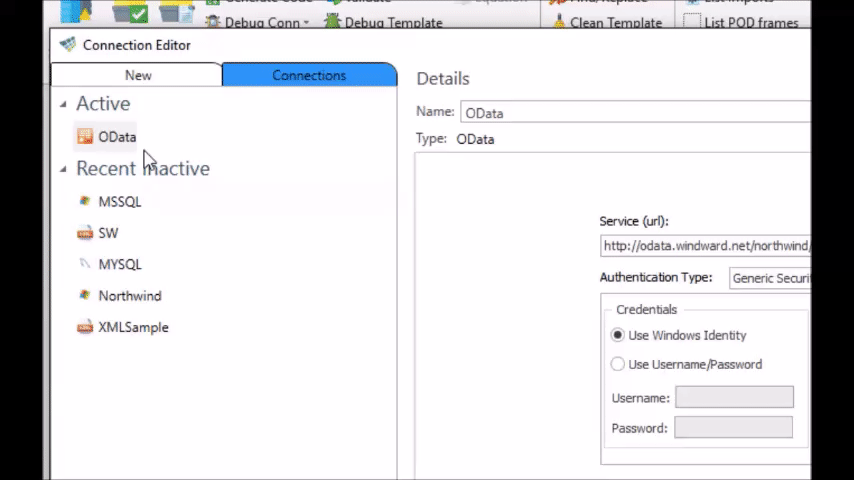
2. Select OData as your vendor
Select your data vendor from the New tab. Since we are using OData in this tutorial, we will select that.
3. Input your OData service address
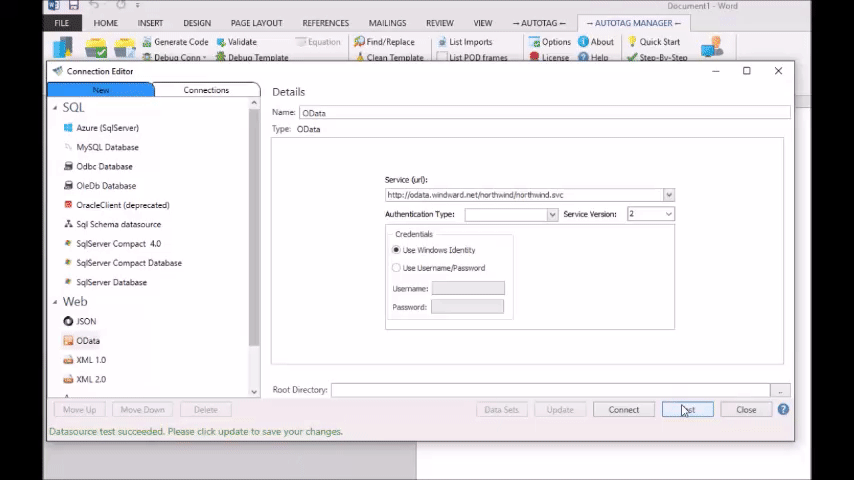
For this example, we’ll be using Windward’s sample Northwind database hosted at: http://odata.windward.net/Northwind/Northwind.svc
If your OData database requires credentials, enter them under the Credentials section. The sample database does not require credentials so leaving this at the default option will work.

4. Name it
Give your datasource a name in the box in the top right corner of the window. This is to identify it later on when you are putting data in a template. When working on future templates, this name will appear in the Data Sources drop down menu which is accessible by clicking the bottom half of the Data Sources button you clicked in step 1. We named this one OData

5. Test the connection
Click Test to test the connection. Some green or red text at the bottom of the window will verify that the information you have entered is correct and that you are able to access the database.

6. Finish adding it
Click Connect to finish. Any errors you encounter will be highlighted in red, otherwise, everything is set up! You'll see your datasource in the Connections tab.
7. Verify the data is accessible
After adding a datasource and closing out of the Connection Editor, the data bin will automatically open. Look at the information listed in the data bin to verify your data is there. In addition, the status icon on the “Data Sources” button will turn green if all your datasources are connected correctly!